So after developing for a couple of years on my VirtualBox Ubuntu server, the 32GB I had allocated wasn’t enough anymore. So I wanted to add some additional space, without loosing my files of course. I have a Ubuntu Server 18.04 with a LVM partition. So I would see something with /dev/mapper/blabla in the df -h.
As with a lot of things that I wrote on this blog, I couldn’t find an easy step-by-step thingy to follow for my specific case. Most of the examples used gparted, but I have Ubuntu Server, so no GUI at all. Others used the VBoxManager command to resize the disk.
In hindsight it was pretty easy, so, let’s go.
Step 1: resize the VirtualBox image
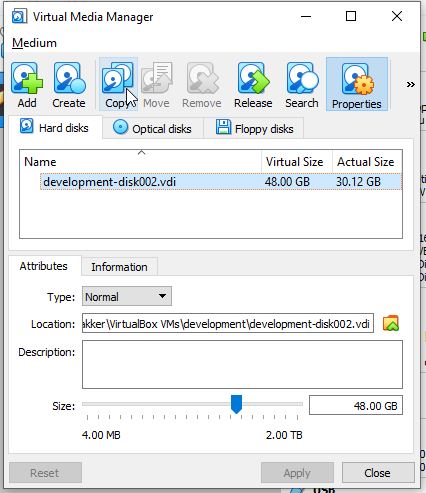
You can use the VirtualBox UI to do this pretty easily. Make sure your virtual machine is shut down. Then go to File, Virtual Media Manager. Select the disk image that is bound to your virtualmachine, and use the slider to add space to your disk image.
 Step 2: resize the partition
I couldn’t find a decent way to resize the partition using the console, that I would dare to execute without being afraid to loose all my files. Eventually I found the link to the gparted live cd.
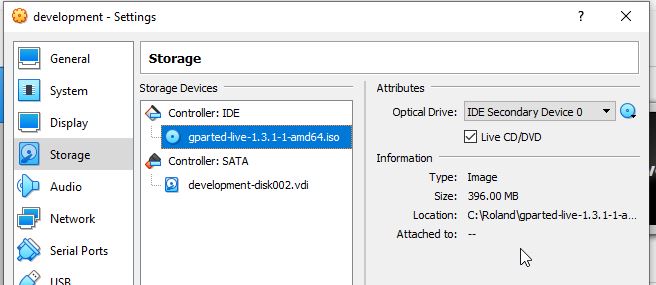
Download it, and mount it as a live CD to your virtual machine.
 Now just boot your virtual machine, and boot with the default settings. You will end up with a bare GUI, start gparted. In my case, my swap partition was at the beginning of the partition table. That was easy; because I could just resize the existing partitions. If your swap partition is in the way, just remember the size, delete it, and create it afterwards (as suggested in this youtube video).
As in this video, just select the partition, right click, and select Resize. I did this for both the extended file system on /dev/sda2 as the LVM partition.
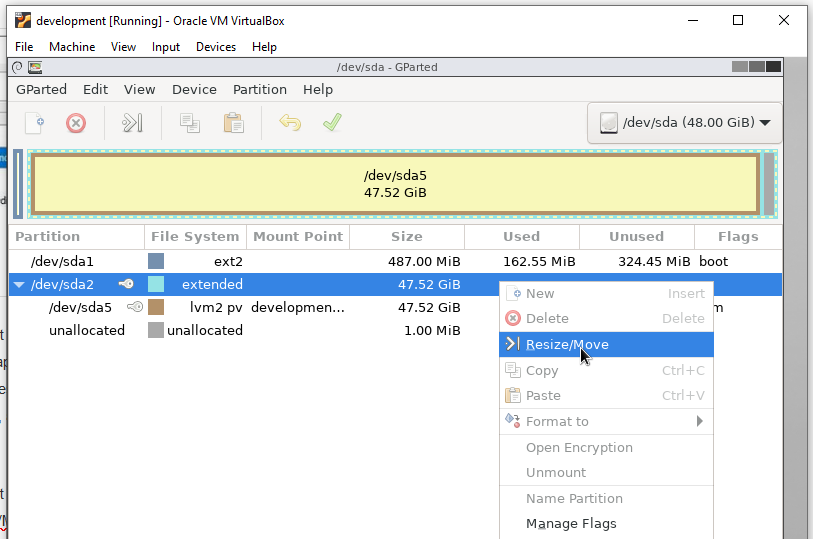 After you selected Resize, just move the slider to the right. So first for /dev/sda2, then for /dev/sda5.
Now remove the live CD, and boot your virtual machine again.
Step 3: expand LVM
Now you need to expand the LVM partition. That’s just two commands.
|
1 |
sudo lvextend -l+100%FREE /dev/mapper/development--vg-root |
and after that:
|
1 |
sudo resize2fs /dev/mapper/development--vg-root |
Of course you need to change the /dev/mapper/blabla thingy to whatever your LVM partition is.
That’s it! df -h now shows the new size.