Bluetooth issues? Buy a dongle.

After a few years of hard work, my laptop had served his purpose and was being replaced with a newer one. I now have a HP ZBook Fury 15 G7 with everything a developer could wish for. Computers are never too fast of course, but this one comes close. Unfortunately, my new Bluetooth adapter was pretty bad.

I have a lot of headphones; I think it might be an obsession. But my excuse is that I have a few at work, and a few at home. On my previous laptop, this wasn’t an issue at all. Actually I was surprised how Windows seemed to always exactly know what the preferred headset was for my conference call.

But with my new laptop, these days were over. The most common problem was that I could not hear the others, but they could hear me. So basically the Bluetooth connection to the headset was working, but it’s not just functioning well. Rebooting the laptop helped. If, after the reboot, I started calling, the headset worked perfectly. But then suddenly a few hours later, or when switching it off/on, it would mysteriously stop working. Yes, I know I can select what device Teams should use, this was all set correctly.

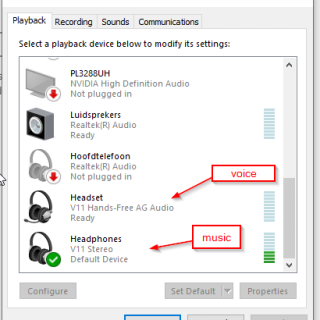
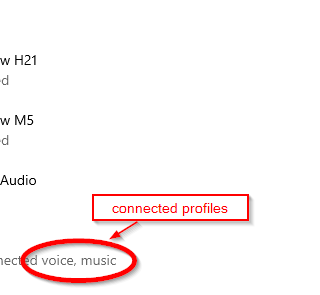
Bluetooth settings in Windows 10Old school sound settings in Windows 10Bluetooth devices nowadays have different profiles, to provide the best experience for each usage. This means that when you want to use your headset for a call, it switches to “voice” mode, which uses different codecs than for music. My theory is that switching between these profiles doesn’t work properly in my case. Maybe some software or resource is keeping the handler open to the “music” profile, while it should switch to “voice” when needed. So voice should take precedence above music. I tried disabling the music profile for some devices in Windows, which is possible, but it didn’t help a bit.

Eventually I was so fed up with this, I impulsively bought a Bluetooth dongle. Since I have two MPOW headsets (H21 for music, M5 for calls), I figured buying a MPOW dongle would probably work best. So I went to my friend Ali, and this time didn’t choose the cheapest option. I bought the Mpow BH519 and hoped for the best. Maybe, just maybe, the problem was within the Bluetooth protocol itself. Maybe some older Bluetooth adapters cannot handle this profile selection thingy at all.

Well, the title of this post already mentioned it of course: it seems to work! Even the cheap bone conducting headphones that wasn’t able to reconnect the music profile at all now suddenly works like a charm.

So, stop tormenting yourself and buy that dongle. And HP and other manufactures: go fix your Bluetooth adapter :-(

By the way, the story continues (a bit). I thought I was being smart by disabling the Bluetooth adapter in my bios, so Windows wouldn’t get confused about which adapter to use to pair with my headphones. At home I don’t use Bluetooth, so for me, so I plugged the dongle in my docking station at work, and I should be fine.

But Windows is still a bit silly. The Bluetooth that were paired to my, now disabled, Bluetooth adapter still show up in my devices, but I cannot remove them. Computer says “remove failed”, that’s it. I could however pair my Bluetooth devices to the new dongle, but now their name was something like “2- V11 Headphones”. It was prefixed with a 2. That annoys the hell out of me.

When I was at home, without the Bluetooth dongle, I re-enabled the Bluetooth adapter in my BIOS and tried removing the devices. Still didn’t work. I had to go to the old school Windows 7 window as shown in the picture above, and from that list I was able to remove the devices.

So my advice would be to remove these Bluetooth devices before you begin. Then disable your Bluetooth adapter in the bios, and then insert the Bluetooth dongle. That would probably keep things as neat as possible.

Update 8 aug 2021: Today I noticed a Bluetooth driver update in my Inter Driver Support Assistant. Wow, I didn’t realize I was such an influencer! Of course I immediately installed this, and so far, it seems to work a whole lot better. Maybe driver version 22.60.0.6 solved my problems. Thanks HP!

Logitech Z-2300 satellite repair

In a previous post I described how you could repair the control pod by replacing the potentiometer. But I had already bought an extra set of these Z-2300 to replace the control pod (which eventually also failed). This extra set was still useful, because I used this on our yearly trip with friends. Our party weekend without kids. This set already has enough volume and an amplifier, so this is much more portable than a normal set of speakers which would need an amplifier.

On those parties, the later it gets, the louder the music is wanted. So eventually the satellites blew up. Normally that would hurt, but since this was a spare set anyways, it didn’t really. I didn’t throw them away yet, and later I tried them again, and indeed, they didn’t sound that well anymore.

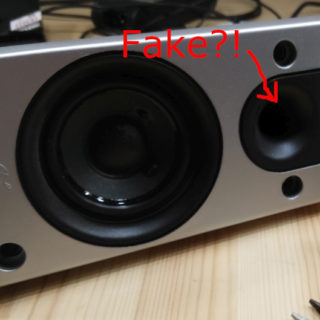
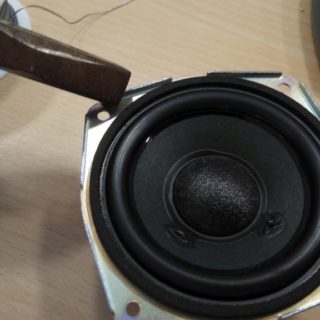
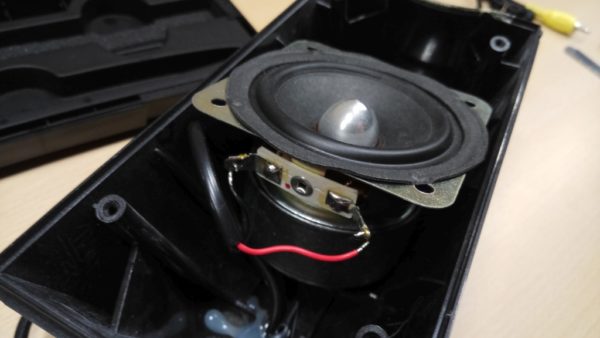
So then I figured: why not fix it, since fixing (or at least trying) electronics is my new hobby anyways. I opened the speakers and was a bit disappointed to see that the hole on top of the speaker was pretty much fake. There was only one speaker in there, and the hole wasn’t even open, so I can’t imagine it has a function.

On the other hand; now I only had to replace one speaker instead of two.

So I tried to measure the speakers a bit, and then went to my favorite website.

Soon I found out that all 3″ inch speakers were a bit too big. So then I tried searching for 2.75″ inch speakers.

Then I even found the original Logitech speakers.


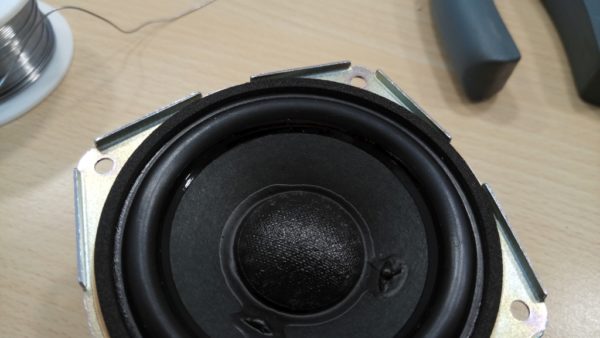
But for this price I could also buy another set at our local ebay. Also I would probably blow them up again. So I continued my search, and eventually settled for this pair.

The sizes don’t match, but I figured somehow I would fit them in anyways.

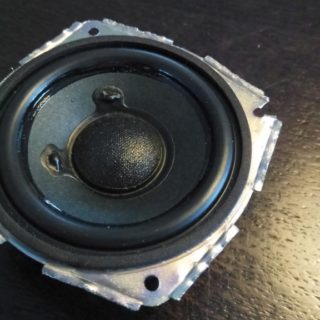
So when they arrived I bent the edged so they would be more flat. Then I cut the wholes so I could use a screw with more flesh to fix the speakers in the original housing. This wasn’t really hard to do. I used a flat-nose plier for the bending and a normal cutter to remove the iron at the holes.

 
All sides bent …

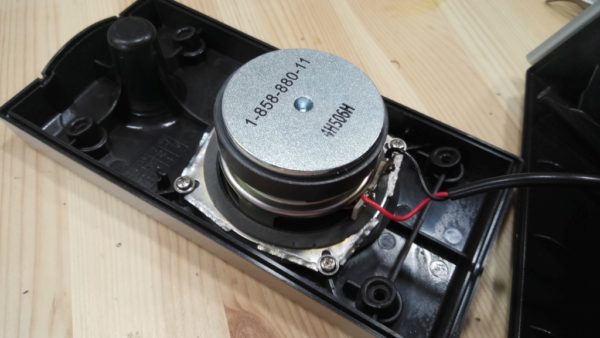
Then I replaced the speakers in their holdings. Note that apparently Logitech switched + and -, because the red wire was connected to – and the black to +. I assume they know how to wire their speakers, so I decided to use the size of the connectors on the speaker as reference. So I put the red wire on the smallest connector and the black one on the largest.

My replaced speaker:Yes, the wires needed to be soldered, but that wasn’t really hard to do. Just heat up the iron on the speaker enough so the wire itself can melt.

Then put everything back together and hook ’em up. I must say that I don’t hear much of a difference. But I’m not sure what they will do on a very high volume. They might blow up as easily as the Logitech speakers.

I guess we’ll have to wait and see.

Logitech Z-2300 Remote Control Pod fix

TL;DR

If you hear a squeaking sound when you’re using your volume knob, I think it might be the potentiometer that’s broken. I replaced it, and now it works!

My beloved Logitech

The Logitech Z-2300 were my first own computer speakers that I bought. I think I still lived at my parents house. My brother got them first, and they just sounded awesome. I never heard any other computer speaker set sound better than this.

Unfortunately after a few years, the speakers started to make squeaking sounds when I turned the volume knob. Also sometimes one channel failed; I would only hear the left or the right speaker. At this time, Logitech didn’t produce the speakers anymore, so there was no chance of getting them repaired by them.

Replacement control pod

So then of course, you find yourself googling for another solution. The speakers where fine, so it would be such a waste to replace the whole set, just because the volume knob gave up.

The first time I did my research, I found a guy who reverse engineered the thing. Then he designed an improved version of the control pod, which he would sell on ebay. I was almost going to buy this, but with shipping and all, this would cost me over 50 euro’s.

On our local ebay, I found whole sets for the same price as what this replacement pod would cost me.

So this is what I did, I bought a complete set, just to replace the control pod. The other speakers did come in handy though, because I would take them whenever we would go to a party weekend with our friends. I didn’t have to worry anymore if the speakers would get blown up, or flooded in beer.

Meanwhile, I already asked a friend who I knew owned such a set too, if he was still using his set. He wasn’t, so I could get his control pod. It wasn’t until recently though when I got my hands on it, and actually I tried it a few weeks ago.

You can probably guess: same issues.

Schematics found

So eventually I did another round of research, and found this technical guy that took apart the control pod as well and reverse engineered it. He posted his findings in a blog.

I am very interested in electronics, Arduino’s, soldering stuff, but reading this (simple) schematic was a little too complicated for me. If I could order the PCB I would, but the link didn’t work.

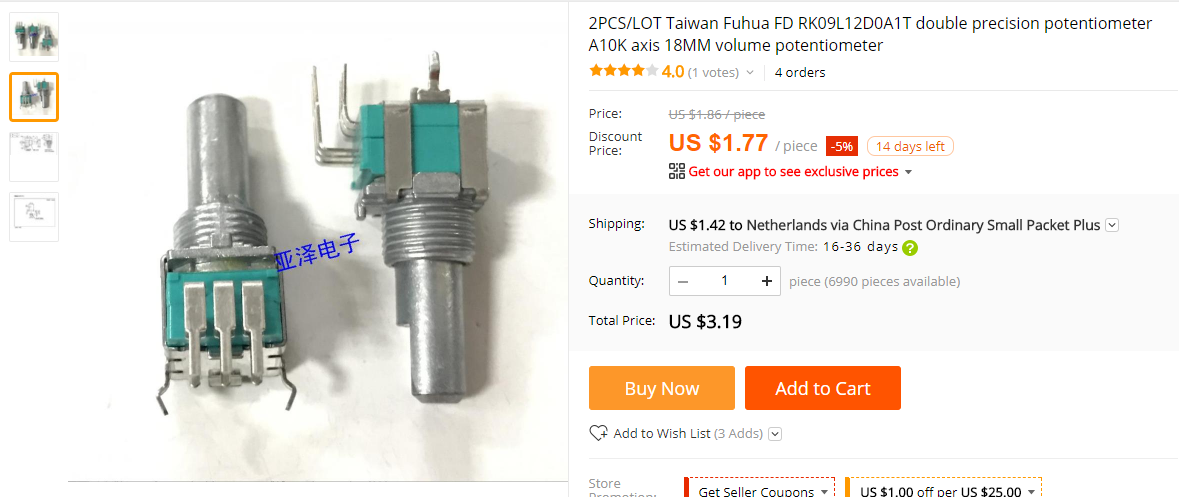
In the comments though, the author was kind enough to tell us what potentiometer we would need to replace it.

So I searched on my favorite site AliExpress, and what do you know .. there they were!

For this kind of money I thought I could give it a shot. Well, also because I had two control pods, of which one was already broken anyways. So in this case there wasn’t that much of a risk.

Replacing the POT

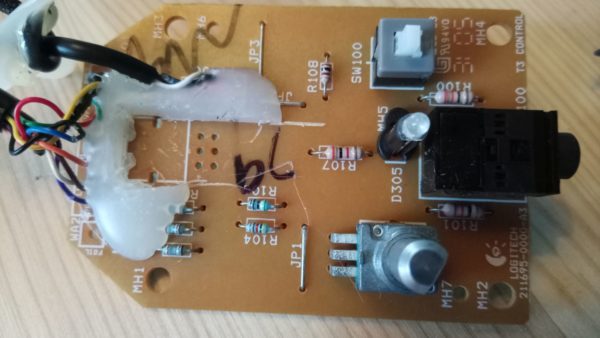
To be honest, I did some soldering before, and already had some equipment in home. Not professional stuff, but enough to get me started. My de-soldering techniques are horrible, so I just cut the six legs of the potentiometer on the board. The I cut away the glue with a utility knife.

Then I first started pulling the potentiometer itself, trying not to break the PCB board. Then the potentiometer itself started to break. So I used my pliers to break it apart. There was still some of the potentiometer left on the board, but I stuck my screwdriver under it and started to move it. Eventually the whole thing launched like a rocket.

Now there was room enough. I cut the legs of the potentiometer as high as possible, so that I had enough left on the board to get them with my pliers. Now it was quite easy to de-solder them, because I could pull the remaining legs out one by one while heating it with my soldering iron. I used some de-soldering wick to get the last solder out, and get the holes open again.

I removed some more of that white glue, so make sure the new potentiometer would fit. And it did.

So now it was very easy to solder the new one. Unfortunately I forgot to make a picture of this too, but well, in the end it worked.

This probably won’t solve all the problems with the control pod, but for this kind of money I guess it’s worth a try. It’s also relative easy, because the pod is large, so the item is easy to remove.

Let me know if it worked for you!

HP ZBook Dock multicast problems

At work my HP ZBook is fed through a nice thunderbolt docking station. I plugin one cable, and everything is connected: power, monitors, network, etc.

Then we started working on a C# project that uses multicast to communicate. I couldn’t receive any messages. I thought it was a VLAN issue first, so I took my notebook and plugged it in the wall, using the outlet a colleague uses who didn’t have these problems with the same software. Suddenly my communication was working as well. So I ‘proved’ that the problem was the network right?

Wrong.

After hours of switching cables in the patch panels, checking traffic in the logs of the switch, I suddenly realized that by taking my laptop to another location, I wasn’t using the docking station anymore. As it turns out the network port on the docking station seems to have problems with the multicast messages.

I don’t know why, but when I use the network interface on my laptop instead of the one on the docking station, the multicast communication is working fine.

So, save yourself hours of investigating this problem, and check your other ethernet port first ;-)

Xiaomi Redmi Pro 5.5 firmware update

I recently bought myself a Xiaomi Redmi Pro 5.5 smartphone. My Jiayu was having problems with wifi that drove me crazy, so it was time for a change. Before my Jiayu I already owned a Xiaomi mi2s. I really liked the specs (compared with the price) for this Redmi phone so I decided I had to buy one.

When I received it I was very happy at first. But after a day I already found a bug; the back button wouldn’t always respond as it should. Sometimes it worked fine, sometimes it would open up the task manager where I could kill (all the) apps, and sometimes it wouldn’t respond at all. A few hours later the button could work again, or not. So that was pretty annoying, because not all apps have a back button in their app (for example when you want to return from an image in Facebook). When I enable vibrate on keypress, it did always vibrate, so I figured it must be a software problem. So let’s flash the rom. I had done it before on the mi2s and Jiayu, so I wan’t exactly a newbie, but I wasn’t really advanced either. Each time when I start adventures like this I am feeling that I am missing information. I am very thankful for people who share their experience and document their issues, so now it’s my turn to share.

The procedure

First I tried to figure out what the procedure is. What files and software do I need? I went to my favorite forum Tweakers and found a subject on the Redmi Pro. But there are several Redmi models, and several “Pro” models but that seems to be Redmi Note Pro? For example, when you check the xiaomi.eu forum, you see this:

Xiaomi Redmi 3 / PRO topic on Xiami forum screenshot

But also this:

Xiaomi Redmi PRO xiaomi.eu forum screenshot

While my phone, when I bought it, is called “Redmi Pro 5.5”. So which one is it? (Spoiler alert: it’s the latter)

Then I also found out I first need to unlock the bootloader to be able to update the firmware. The firmware seems to be protected by ‘locking’ the phone. You need to get permission from Xiaomi to unlock it.

A lot of questions to start with, but I’ll try to answer them here.

Unlock the phone

You really have to unlock your phone by filling in a request at the website: http://en.miui.com/unlock/ .. click on “Unlock” and first on English at the bottom. For the dutch people; Tweakers has a dedicated topic on unlocking the bootloader. As far as I know, there is no way around this. You can’t hack this with other images, firmware or apps. So the sooner you place your request, the better.

My mistake here was that it turned out I have two xiaomi accounts. One was automatically created when I bought my Xiaomi mi2s and uses my phonenumber as a login name. The second one I probably created myself with my e-mail address, when I wanted to post something on their forum. When I went through the configuration of my new redmi, the Xiaomi account was also enabled, bound to my phonenumber again. Then I asked for unlock permission with my e-mail address account which didn’t match with the account on my phone.

So, make sure your xiaomi login on your phone is the same as you are requesting your unlock code with. You can check this by checking out your ID, which is a number. I found I could login on this website: http://en.miui.com/forum.php and then selecting Sign in in the upper right corner. Once signed in, you can view your profile:

Xiaomi profile screenshot

This didn’t match the ID that I found in my phone settings under Accounts:
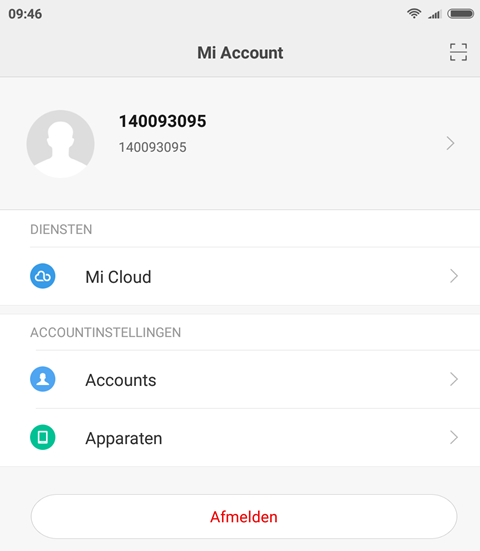
Android accounts xiaomi account screenshot

So. This was my biggest mistake that cost me a few hours, and a few days before I realized this. Once you request the unlock code with the same ID that’s on your phone, the unlock procedure went just fine.

When your id’s don’t match either, I guess your phone already created the account for you, based on your phone number. You should be able to login using the webpage as well. In my case, my username was my phone number (including country code). If you don’t remember your password, you might be in trouble, because restoring your password is a pain in the ass (I didn’t receive any SMS or email when I tried to restore my credentials). Maybe it’s better to connect your phone to the xiaomi account that you do know the password for.

Request unlock permission

To request an unlock code, you need your device to be registered with Xiaomi. In my case, there was a ROM installed that would already connect my Xiaomi account. But I read on forums this isn’t always possible. In that case you should install the developer rom first.

I tried this too, but I couldn’t get the developer rom installed, no matter how I tried. As it turned out I didn’t have to; I could already unlock my phone. I suggest you try to unlock your phone first, because this is very easy, and it won’t break anything if it won’t unlock. In my case, I could see my Xiaomi account in my phone settings under ‘Accounts’.

This tutorial describes how to bind your phone to your account to unlock it. But like I said; in my case it didn’t work because my phone was already bound. After you bound the phone, proceed with requesting unlock permissions.

But requesting unlock permission isn’t that easy either. You need to fill in a reason (it is said in forums you need to have a real reason, people at Xiaomi will manually check this). But to be able to send the form, you need to enter a pin code that is sent through SMS.

I didn’t receive the SMS on my dutch phone number. Ever.

I tried several other countries, in the end the German number seemed to work fine (twice). But it’s annoying, because you need to check the PIN code through this webpage. After that your request will be handled within a few days (max 10). Of course you will receive the notification on the phone number you entered :-(. But no worries, just login a few times a day and see if your request in accepted. You will then see something like this:
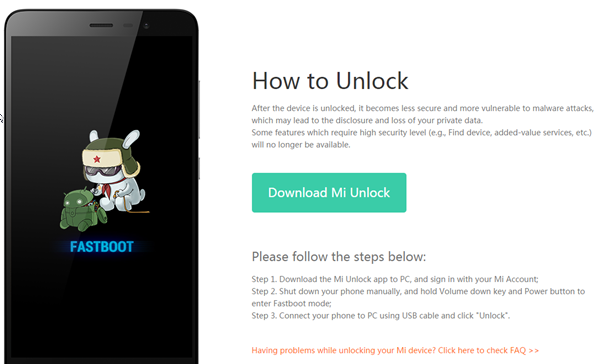
Screenshot of approved xiaomi unlock

Install new firmware

When I finally had my phone unlocked, I could follow this tutorial to install new firmware. Make sure you have the USB debugging enabled in your developer options. The versions are pretty confusing as well. At the time of writing, 7.19/20 is the newest, but this installs MIUI 8.2. You will see a forum thread, but in that thread you will find the download links.

The version you need it the omega version, or HMPro. So when you go to the download section, you need a filename that looks like this: xiaomi.eu_multi_HMPro_V8.1.2.0.MHQCNDI_v8-6.0.zip. Is the HMPro part that’s important here.

I copied the ROM by plugging the USB cable to my computer and phone. In your drawer, you can see the USB icon and if you click it, it gives you three options: charging, exchange files, and something with media or pictures. Anyways, I choose the second one. In my case my computer recognized the phone and I could you it the same way as a thumb drive.

Another option is to take your SD card out of your phone and place it in your computer. This is probably the quickest way too.

Then you need to install TWRP as stated in the tutorial, boot it, and well, basically just follow the steps in the tutorial.

I desperately tried installing the rom without unlocking my phone first (I thought maybe it already was unlocked), but this just wouldn’t work. Not with MiFlash, not with ADB fastboot, not with the updater app.

Once your phone is unlocked and you know what you’re doing, the process is actually really simple and shouldn’t take more than half an hour. In fact, downloading the rom probably takes the most time ;-)

Was it all worth it?

Yes, it was a worthwhile experience,
It was worth it.

My back button seems to work properly now, and also I was able to install SuperSu with TWRP which gives me root access. With root access I can change my DPI setting to 401, which gives the same effect as increasing the resolution on your computer’s monitor. Icons and text become smaller and you have more space on your display. So that was a positive side affect too. Also the xiaomi.eu seem to have less Chinese bloatware.

To finish it all, I installed a ZIP file that is supposed to remove a wifi speed limitation. I didn’t check my download speed, but I figured that I might as well install it while I was at it.

If you have any questions, drop them in the comments, although I doubt I can answer them ;-)

Good luck!
Samsung Xpress M2022W fix wifi problems

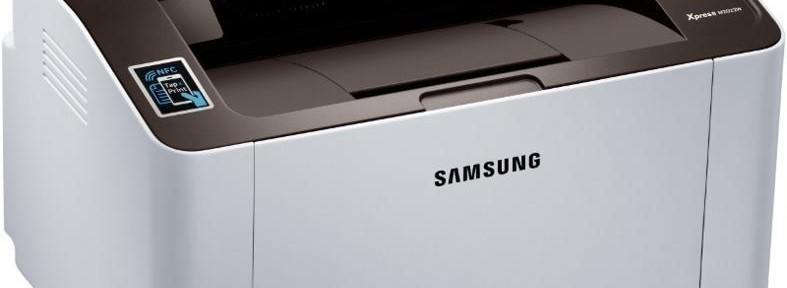
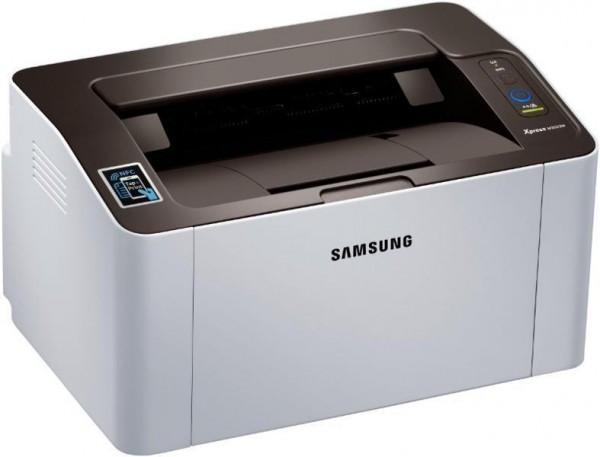
My mom was using her samsung m2022w printer for about 17 months when all of the sudden it just didn’t work anymore. I spent hours and hours trying to fix this and eventually succeeded.

Samsung xpress m2022w

Things I tried:

  • Update the firmware to it’s latest version. Be aware that you cannot change it back easily. I could not find older firmware versions on the samsung website.
  • Update the software of course.
  • Changed the location of the printer, because it said the signal was poor.
  • I took it home, because the router also recently changed, so I figured the new modem from the internet provider was just crappy.

In the end, as a last resort, I tried configuring the IP static one more time. I disabled the “auto IP” option, left it at DHCP (instead of BOOTP), and choose to enter my IP manually. Filled in all the details, and this time I got lucky and it connected to the network without any issues. By the way, to do this I had to connect the printer with the USB cable. Also disable Wi-Fi Direct because I don’t think the printer has two wlan radio’s on board.

I first changed these settings in the Easy Print Manager. The wifi wizard wasn’t working there, Windows would give an error telling me I should install the right software or something like that. But I was able to configure the network to be manually. Although it didn’t really feel like it was saving the configuration, but I checked by turning the printer off and on again. The settings were still there. Also now when I turned the printer on, the WPS button turned blue, without flashing, and stayed blue.

Now I could run the diagnostic tool. Here I updated all drivers, but on the bottom there is also an easy wifi setup tool thingy. At the version I used, I could also change the TCP/IP settings here. Just to be sure, I also configured the IP as static in here. To be sure it didn’t conflict, I used another static IP though, because I wasn’t sure which config would win: the one from Easy Print Manager, or the one using this wizard kind of setup.

I had used this wizard many times before, but when it was sending my configuration to the printer, that would just fail. This time it didn’t fail, it went right through, and I could finish the setup.

Finally I could also disconnect the USB. Opening up Easy Print Manager now showed the printer with it’s static IP, and I could print from notepad. Great!

So bottom line: use a static IP.

Update 29 jan 2017: In the end, we returned this printer twice to be repaired. On the one hand it’s great that Samsung gives this kind of support on such a cheap printer. On the other hand it’s really disappointing that we had to go through all this… packaging, waiting, etc. This first time they only updated the firmware which didn’t work. Second time they actually replaced something (can’t remember what though) and I think it works better now.

HP Laserjet 400 slow job processing

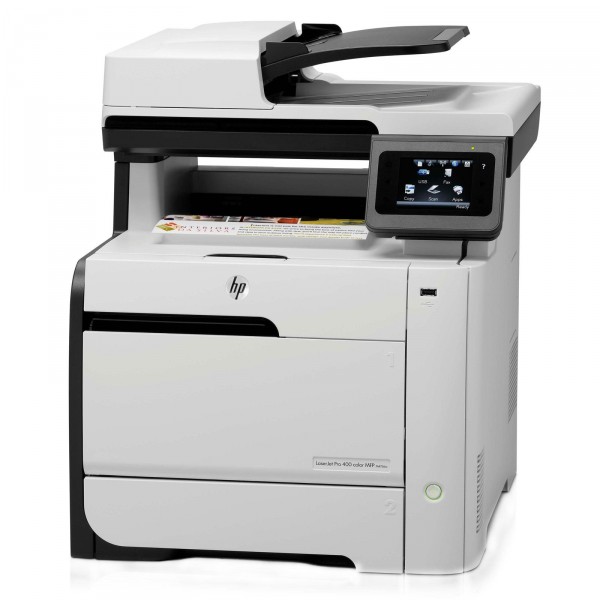
At the office, we got ourselves a nice HP Laserjet 400. Because it could do all things: print, fax, scan, and it should be OS X compatible too.

1329315003

But when we wanted to print a document from our laptops, all connected to our gigabit LAN, it took ages before the printer finally started processing the job. So I installed some additional memory to the printer, which wasn’t too expensive anyways from eBay. Still no improvement. Some prints would come out fast, some prints didn’t. I thought it had something to do with processing the document to the right format for the printer. Isn’t that what PCL isn’t all about? Maybe the OS X drivers couldn’t talk to the laserjet in the most efficient way. Maybe the drivers aren’t that good after all.

Eventually I kind of gave up on the machine. My colleagues were already using our old laserjet 1320 anyways. The Laserjet 400 basically degraded to a really expensive scanner, at which it’s not very good either by the way.

Until one day extra people joined our team, and we moved the furniture around a bit in the office to create extra workspaces. This time I connected the printer through wifi, and now it seems that prints are coming through way faster.

So although I don’t understand why this is working better, just give it a try. It might work for you as well!